Retaining Wall Cost: 2024 Pricing Guide & Cost-Saving Tips
Retaining wall costs typically range from $25 to $50 per square foot, with a national average of $5,800 for a complete project. As a seasoned house flipper, I’ve seen firsthand how these sturdy structures can transform a property, but I also know they can take a bite out of your budget if you’re not careful.
In this comprehensive guide, we’ll dive deep into the world of retaining walls, exploring everything from material costs to DIY tips. Whether you’re looking to tame a sloping yard or create an eye-catching landscape feature, you’ll find all the information you need to make smart decisions and potentially save thousands on your project.
Retaining Wall Cost Table
| Wall Length (ft) | Wall Height (ft) | Material Preference | Low-End Estimate ($/ft²) | Average Estimate ($/ft²) | High-End Estimate ($/ft²) | Total Low-End Cost ($) | Total Average Cost ($) | Total High-End Cost ($) |
|---|---|---|---|---|---|---|---|---|
| 20 | 4 | Basic Concrete | 20 | 30 | 40 | 1,600 | 2,400 | 3,200 |
| 50 | 6 | Reinforced Concrete | 25 | 35 | 50 | 7,500 | 10,500 | 15,000 |
| 30 | 8 | Decorative Concrete | 30 | 45 | 60 | 7,200 | 10,800 | 14,400 |
Explanation:
- Wall Length (ft): The total length of the retaining wall.
- Wall Height (ft): The height of the retaining wall.
- Material Preference: Different types of concrete options like basic, reinforced, or decorative concrete.
- Low-End Estimate ($/ft²): The lower cost per square foot, typically using the most basic materials.
- Average Estimate ($/ft²): A mid-range cost per square foot, using standard materials.
- High-End Estimate ($/ft²): The higher cost per square foot, including premium materials or additional features.
- Total Low-End Cost ($): Total cost calculated using the low-end estimate.
- Total Average Cost ($): Total cost calculated using the average estimate.
- Total High-End Cost ($): Total cost calculated using the high-end estimate.
You can adjust the wall length, height, and material preference to generate a custom cost estimate for a specific project. The ranges provide flexibility in budgeting based on different quality and material preferences.
Quick Reference: Retaining Wall Costs at a Glance
Before we roll up our sleeves and get into the nitty-gritty, let’s take a bird’s-eye view of retaining wall costs. This quick reference will give you a solid starting point for budgeting your project.
Here’s a table displaying on various devices, including columns for Material Type, Cost per Square Foot (Range), and Average Cost for a 50 ft. x 4 ft. Wall:
| Material Type | Cost per Square Foot (Range) | Average Cost for a 50 ft. x 4 ft. Wall |
|---|---|---|
| Concrete Blocks | $15 – $30 | $3,000 – $6,000 |
| Poured Concrete | $20 – $40 | $4,000 – $8,000 |
| Wood | $10 – $25 | $2,000 – $5,000 |
| Stone/Boulders | $25 – $50 | $5,000 – $10,000 |
| Brick | $30 – $60 | $6,000 – $12,000 |
| Gabion | $20 – $45 | $4,000 – $9,000 |
| Steel/Metal | $25 – $55 | $5,000 – $11,000 |
Now that you have a general idea of the costs involved, let’s break down the factors that can make or break your budget.
Factors Affecting Retaining Wall Costs
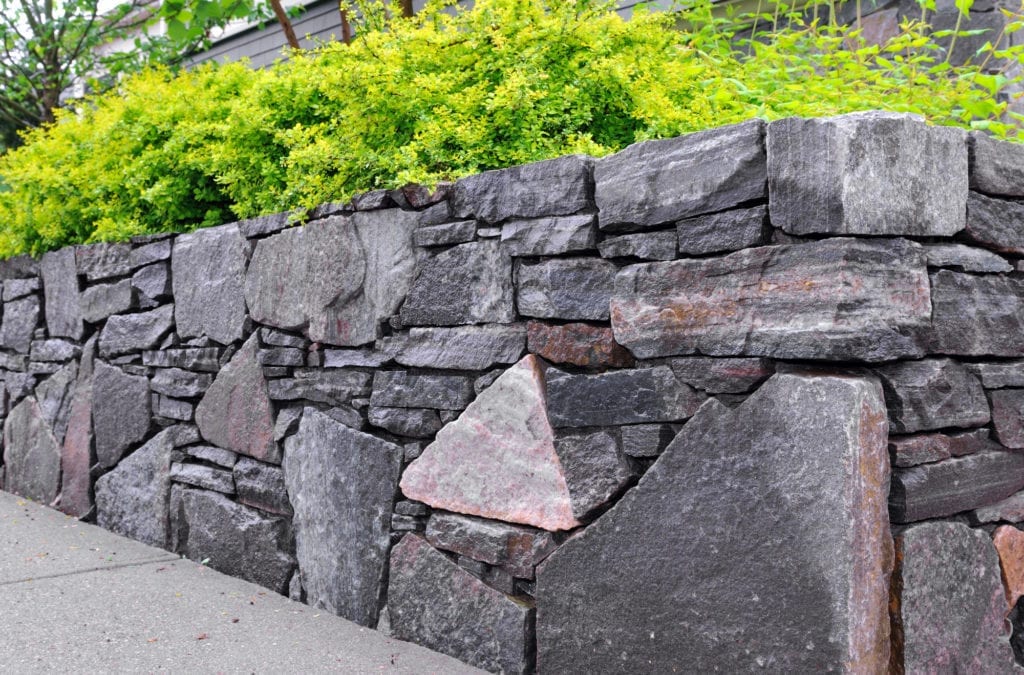
When it comes to retaining walls, there’s no one-size-fits-all price tag. In my years of experience flipping houses, I’ve seen how various factors can cause costs to fluctuate dramatically. Let’s dig into the key elements that will influence your bottom line:
A. Wall Height and Length
The size of your retaining wall is the most significant cost driver. Here’s why:
- Height: Taller walls require deeper foundations and more reinforcement, increasing both material and labor costs.
- Length: Longer walls obviously need more materials, but they can also complicate the installation process, potentially driving up labor costs.
Pro Tip: For every foot of height over 4 feet, expect your costs to increase by about 25%. Walls over 4 feet tall often require engineering plans and permits, which can add $300-$1,000 to your project.
B. Material Selection
Your choice of materials can make a huge difference in both cost and aesthetics. Here’s a quick rundown:
- Concrete Blocks: $15-$30 per square foot
- Poured Concrete: $20-$40 per square foot
- Wood: $15-$25 per square foot
- Stone/Boulders: $25-$75 per square foot
- Brick: $20-$30 per square foot
- Gabion: $20-$40 per square foot
- Steel/Metal: $30-$60 per square foot
Remember, these prices include both materials and standard installation costs. The final price can vary based on your location and the complexity of the project.
C. Site Accessibility
This is a factor many homeowners overlook, but it can significantly impact your costs. Here’s what you need to consider:
- Ease of access: If heavy machinery can easily reach your site, you’re in luck. If not, prepare for higher labor costs.
- Slope severity: Steeper slopes require more complex engineering and installation, driving up costs.
- Obstacles: Trees, existing structures, or utilities that need to be worked around can increase labor time and costs.
D. Soil Conditions
The ground you’re building on plays a crucial role in your wall’s design and cost:
- Stable soil: If you’re blessed with stable, well-draining soil, you’re looking at standard installation costs.
- Problem soils: Clay, sandy, or water-saturated soils may require additional excavation, special foundations, or drainage solutions, all of which can increase costs by 10-30%.
E. Labor Costs
Labor typically accounts for 50-60% of your total retaining wall cost. Factors affecting labor costs include:
- Project complexity
- Local labor rates
- Time of year (busy seasons can mean higher rates)
F. Permits and Regulations
Don’t forget about the paperwork! Depending on your location and wall height, you may need:
- Building permits: Usually required for walls over 4 feet tall, costing $100-$1,000.
- Engineering plans: Often necessary for taller or more complex walls, adding $300-$2,000 to your project.
- Inspections: May be required at various stages of construction, potentially adding time and cost to your project.
Expert Quote:
“In my 20 years of contracting, I’ve found that the most overlooked cost factor is site preparation. Homeowners often underestimate the work needed to create a stable foundation for their retaining wall. This can include excavation, grading, and sometimes even bringing in additional soil. Always budget an extra 10-15% for site prep to avoid unpleasant surprises.” – Vince Ciccolinni, Licensed Contractor
Understanding these factors is crucial for budgeting your retaining wall project accurately. In the next section, we’ll take a closer look at different retaining wall materials and help you choose the best option for your needs and budget.
Retaining Wall Materials: Costs, Pros, and Cons
As a house flipper, I’ve worked with just about every retaining wall material out there. Each has its own unique set of advantages and challenges. Let’s break them down so you can make an informed decision for your project.
Here a Comparison Table describing Material, Average Cost per Sq Ft, Pros, Cons, and Typical Lifespan:
| Material | Average Cost per Sq Ft | Pros | Cons | Typical Lifespan |
|---|---|---|---|---|
| Concrete Blocks | $15 – $30 | Durable, versatile, low maintenance | Requires skilled labor, can be costly | 50+ years |
| Poured Concrete | $20 – $40 | Strong, long-lasting, seamless design | Prone to cracking, expensive | 50+ years |
| Wood | $10 – $25 | Natural look, cost-effective | Prone to rot and pests, regular maintenance required | 15 – 20 years |
| Stone/Boulders | $25 – $50 | Aesthetic appeal, highly durable | Heavy, requires professional installation, expensive | 50+ years |
| Brick | $30 – $60 | Classic look, durable, low maintenance | Expensive, time-consuming installation | 50+ years |
| Gabion | $20 – $45 | Environmentally friendly, flexible | Can be bulky, limited aesthetic appeal | 50+ years |
| Steel/Metal | $25 – $55 | Modern look, high strength | Prone to rust, requires treatment, expensive | 25 – 50 years |
A. Concrete Blocks
Cost: $15-$30 per square foot
Pros:
- Durable and long-lasting (50-100 years with proper maintenance)
- Variety of styles and colors available
- Relatively easy DIY installation for small projects
Cons:
- Can look generic if not properly designed
- Heavier than some alternatives, potentially increasing labor costs
Pro Tip: Look for interlocking concrete blocks. They’re easier to install and often don’t require mortar, which can save on labor costs.
B. Poured Concrete
Cost: $20-$40 per square foot
Pros:
- Extremely durable (100+ years with proper maintenance)
- Can be customized with various finishes and colors
- Ideal for curved or uniquely shaped walls
Cons:
- Usually requires professional installation
- Prone to cracking in areas with frequent freeze-thaw cycles
Insider Insight: Consider adding a decorative finish like stamping or staining to your poured concrete wall. It can transform a utilitarian structure into a standout landscape feature.
C. Wood
Cost: $15-$25 per square foot
Pros:
- Natural, warm appearance
- Relatively inexpensive
- Easy to work with for DIY projects
Cons:
- Shorter lifespan (10-20 years) due to rot and insect damage
- Requires regular maintenance (staining, sealing)
Flipper’s Tip: If you’re set on wood, consider using cedar or redwood. They’re naturally resistant to rot and insects, potentially doubling your wall’s lifespan.
D. Stone and Boulders
Cost: $25-$75 per square foot
Pros:
- Timeless, natural aesthetic
- Extremely durable (100+ years)
- Can handle heavy loads
Cons:
- One of the most expensive options
- Labor-intensive installation
- May require specialized equipment
Real-World Example: On a recent flip in the Rockies, I used local boulders for a retaining wall. While it was pricey upfront, the wall blended perfectly with the natural surroundings and became a major selling point for the property.
E. Brick
Cost: $20-$30 per square foot
Pros:
- Classic, elegant appearance
- Durable (50-100 years with proper maintenance)
- Good for smaller walls
Cons:
- Labor-intensive installation
- Limited color options
- Can be prone to frost damage in cold climates
Money-Saving Hack: Consider using brick veneer over a concrete block wall. You’ll get the look of brick at a fraction of the cost.
F. Gabion
Cost: $20-$40 per square foot
Pros:
- Excellent drainage
- Can use local stones to reduce material costs
- Flexible and can settle without cracking
Cons:
- Industrial appearance may not suit all landscapes
- Requires careful installation to prevent bulging
- Can be a haven for weeds
Unique Application: In a recent coastal project, we used gabion walls filled with local beach stones. It not only saved on material costs but also created a stunning, site-specific design feature.
G. Steel/Metal
Cost: $30-$60 per square foot
Pros:
- Modern, industrial aesthetic
- Thin profile maximizes usable space
- Long-lasting (50+ years with proper treatment)
Cons:
- Can be expensive
- May rust if not properly treated
- Requires professional installation
Designer’s Note: Cor-ten steel, which develops a stable rust-like appearance, is gaining popularity for its unique look and low maintenance needs.
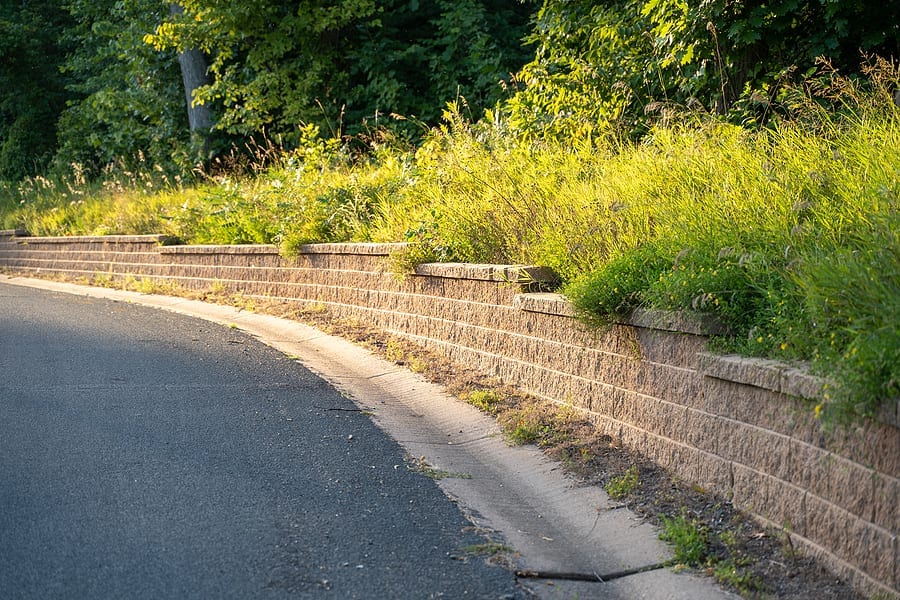
Choosing the right material for your retaining wall is crucial not just for your budget, but for the long-term success of your project. Consider factors like your local climate, the wall’s purpose, and your property’s overall aesthetic when making your decision.
Types of Retaining Walls and Their Costs
Now that we’ve covered materials, let’s dive into the different types of retaining walls you might encounter. Each type has its own ideal applications and cost considerations.

A. Gravity Walls
Cost: $15-$25 per square foot
These walls rely on their own weight to hold back soil. They’re typically made of heavy materials like concrete blocks or stone.
Best for: Walls under 4 feet tall
Cost factors:
- Material weight (heavier materials increase cost)
- Wall height (cost increases exponentially with height)
B. Cantilevered Walls
Cost: $20-$40 per square foot
These L-shaped walls use leverage to resist soil pressure. They’re usually made of poured concrete with steel reinforcement.
Best for: Walls over 4 feet tall
Cost factors:
- Excavation depth (deeper footings increase cost)
- Amount of steel reinforcement needed
C. Anchored Walls
Cost: $30-$60 per square foot
These walls use cables or other ties anchored into the soil behind them for extra support.
Best for: Very tall walls or those holding back significant weight
Cost factors:
- Excavation for anchors (can be extensive)
- Specialized equipment and expertise needed

D. Counterfort Walls
Cost: $25-$45 per square foot
Similar to cantilevered walls, but with added vertical supports (counterforts) on the backside.
Best for: Very tall walls (over 20 feet)
Cost factors:
- Additional concrete and reinforcement for counterforts
- More complex forming and pouring process
E. Sheet Piling Walls
Cost: $40-$70 per square foot
These walls consist of interlocking sheets of steel, vinyl, or wood driven into the ground.
Best for: Areas with soft soil or limited space
Cost factors:
- Material costs (steel is typically most expensive)
- Specialized installation equipment

Real-World Insight: On a recent project, we faced a challenging 12-foot slope in a tight urban lot. We opted for an anchored wall, which allowed us to create a stable structure without encroaching on the property line. While it was more expensive upfront, it maximized usable space and became a key selling feature of the home.
Remember, the type of wall you choose will depend on various factors including soil conditions, wall height, available space, and budget. For walls over 4 feet tall, it’s crucial to consult with a structural engineer to ensure your wall is safe and properly designed.
DIY vs. Professional Installation: Cost Comparison
As a seasoned house flipper, I’ve tackled my fair share of DIY projects, but I’ve also learned when it’s best to call in the pros. When it comes to retaining walls, the decision between DIY and professional installation can significantly impact both your budget and the final result.
A. DIY Considerations
If you’re handy and up for a challenge, DIY can be an attractive option, especially for smaller walls. Here’s what you need to know:
Potential Cost Savings:
- Materials only: $10-$30 per square foot
- Savings: Up to 50% compared to professional installation
Skills Required:
- Basic masonry or carpentry (depending on material)
- Ability to read and follow technical plans
- Physical strength and endurance
Tools Needed:
- Shovel and pickaxe
- Wheelbarrow
- Plate compactor (can be rented)
- Mason’s level
- Hammer drill (for anchoring, if needed)
Time Investment:
- A 20ft x 4ft wall could take a DIYer 40-60 hours to complete
Hidden Costs to Consider:
- Tool rental or purchase
- Potential mistakes and do-overs
- Your time (what else could you be doing?)
DIY Pro Tip: Start with a small wall (under 3 feet tall) to gain experience. Many manufacturers offer block systems designed for DIY installation, complete with detailed instructions.
B. Benefits of Professional Installation
While more expensive upfront, professional installation offers several advantages:
Cost Range:
- $20-$50 per square foot (including materials and labor)
Advantages:
- Expertise and Experience: Pros know how to handle unexpected issues like poor soil conditions or drainage problems.
- Speed: A team can complete in days what might take a DIYer weeks.
- Warranty: Many contractors offer warranties on their work.
- Permits and Regulations: Professionals can navigate local building codes and obtain necessary permits.
- Safety: Particularly important for taller walls or challenging sites.
Real-World Example: On a recent flip, I decided to DIY a small 2ft x 20ft retaining wall using interlocking blocks. While I saved about $1,000 on labor, it took me a full weekend plus evenings the following week. For the larger 6ft x 40ft wall on the same property, I hired pros. They finished in two days, handled some unexpected drainage issues, and the final result was noticeably more polished.
C. Cost Breakdown Comparison
To illustrate the difference, let’s break down the costs for a 30ft x 4ft concrete block retaining wall:
Here’s a comparison table highlighting the total cost difference between DIY and Professional costs:
| Cost Item | DIY Cost | Professional Cost |
|---|---|---|
| Materials | $3,000 – $4,000 | $3,500 – $5,000 |
| Labor | $0 (DIY) | $2,000 – $3,500 |
| Equipment Rental | $500 – $1,000 | $1,000 – $1,500 |
| Permits/Inspections | $200 – $300 | $200 – $300 |
| Total | $3,700 – $5,300 (🔵) | $6,700 – $10,300 (🔴) |
Explanation:
- Cost Item: Different components that contribute to the overall cost of building a concrete retaining wall.
- DIY Cost: Estimated cost range for doing it yourself.
- Professional Cost: Estimated cost range for hiring a professional.
Color Coding:
- 🔵 DIY Total Cost: Highlighted in blue to indicate the lower cost range.
- 🔴 Professional Total Cost: Highlighted in red to indicate the higher cost range.
DIY Total: Approximately $3,500 – $4,500
Professional Total: Approximately $6,000 – $7,500
Case Study: DIY vs. Professional Installation of a Concrete Retaining Wall
Overview: A homeowner, John, in Austin, Texas, decided to tackle the installation of a concrete retaining wall in his backyard. The wall was necessary to prevent soil erosion and to create a level area for a garden. John considered two options: doing it himself (DIY) or hiring professionals. This case study compares the time invested, challenges faced, and final results of each approach.
DIY Installation
Time Invested:
- Planning and Preparation: 2 weeks (research, design, purchasing materials)
- Construction: 3 weekends (approximately 48 hours of labor)
- Total Time: 4 weeks
Challenges Faced:
- Skill Level: John had basic construction skills but struggled with leveling the ground and ensuring proper drainage.
- Equipment: Renting equipment like a plate compactor and concrete mixer added complexity and cost.
- Physical Labor: The manual labor was intense, particularly in moving heavy concrete blocks and mixing concrete.
- Errors: Miscalculations in leveling led to uneven sections, requiring rework.
Final Results:
- Appearance: The wall was functional but had some visible imperfections, such as uneven blocks and slight tilting in one section.
- Durability: Without professional knowledge, John missed some key elements in drainage, leading to minor water pooling behind the wall during heavy rain.
- Cost: Approximately $1,200 (materials, equipment rental, and additional expenses).
Professional Installation
Time Invested:
- Planning and Preparation: 1 week (consultation and design approval)
- Construction: 4 days (professional team of 3 workers)
- Total Time: 1.5 weeks
Challenges Faced:
- Project Management: The professionals encountered rocky soil, requiring additional excavation. However, their experience allowed them to adjust without significant delays.
- Permitting: The professionals handled all necessary permits, avoiding potential legal issues.
Final Results:
- Appearance: The wall was perfectly level, with clean lines and an attractive finish.
- Durability: Proper drainage was installed, ensuring the wall’s longevity and stability.
- Cost: Approximately $3,500 (including materials, labor, and additional work for rocky soil).
Comparison
Time:
- DIY took significantly longer due to the learning curve, while professionals completed the project efficiently within a week and a half.
Challenges:
- DIY involved more physical labor and rework, while professionals handled challenges smoothly.
Final Results:
- The professional installation resulted in a higher-quality wall with better durability and appearance.
Cost:
- DIY was cheaper upfront, but the potential long-term issues could lead to additional expenses. The professional option was more expensive but offered peace of mind and a polished final product.
Conclusion:
While DIY can save money, it often comes with significant challenges and risks. Professional installation, though more expensive, typically results in a superior, long-lasting product. For homeowners with limited construction experience, hiring professionals for complex projects like concrete retaining walls is often the better investment.
The Bottom Line: DIY can save you money, especially on smaller projects, but it comes with risks and a significant time investment. For walls over 4 feet tall or in challenging sites, the expertise and efficiency of professionals often justify the higher cost.
Cost-Saving Tips for Your Retaining Wall Project
Whether you decide to DIY or hire a pro, there are always ways to trim your budget without compromising on quality. Here are some insider tips I’ve learned over years of house flipping:
A. Material Selection Strategies
- Consider engineered alternatives: Segmental retaining wall systems can be cheaper and easier to install than traditional materials.
- Shop around: Prices can vary significantly between suppliers. Don’t be afraid to negotiate, especially for large orders.
- Look for remnants or overstock: You might score high-end materials at a fraction of the cost.
B. Timing Your Project
- Off-season discounts: Contractors often offer better rates during their slow seasons (typically late fall to early spring).
- Bulk projects: If you have multiple landscaping projects, bundling them can lead to better rates.
C. Combining with Other Landscaping Work
- Earthwork efficiency: If you’re already bringing in heavy machinery for other projects, adding the retaining wall can save on equipment costs.
- Material synergy: Excess soil from other projects can be used as backfill for your retaining wall.
D. Negotiating with Contractors
- Get multiple bids: Aim for at least three quotes to ensure competitive pricing.
- Ask about material alternatives: Experienced contractors can often suggest cost-effective materials that still meet your aesthetic goals.
- Sweat equity: Some contractors will lower their price if you handle some aspects, like site prep or final landscaping.
Expert Quote:
One often-overlooked way to save on retaining walls is to work with the natural contours of your land. Instead of one tall wall, consider a series of smaller terraced walls. This can reduce material costs, simplify construction, and create a more natural, appealing look. – Martin Addair, Landscape Architect with 25 years of experience
Money-Saving Hack: If you’re set on a high-end look but working with a tight budget, consider using a more expensive material for the visible cap of the wall, while using cheaper materials for the bulk of the structure.
Remember, while it’s great to save money, don’t cut corners on crucial aspects like proper drainage or structural integrity. A well-built retaining wall is an investment in your property’s value and safety.
Retaining Wall ROI and Property Value Impact
As a house flipper, I’m always thinking about return on investment (ROI). Retaining walls can be a significant expense, so it’s crucial to understand their impact on your property’s value.
A. Short-term vs. Long-term Value
Short-term:
- Immediate curb appeal boost
- Potential to solve drainage or erosion issues
Long-term:
- Increased usable land area
- Prevention of soil erosion and structural damage
B. Aesthetic Improvements
- Creates visual interest in flat yards
- Allows for tiered landscaping and gardens
- Can serve as a focal point in landscape design
C. Functional Benefits
- Soil stabilization
- Flood control
- Creation of level areas for patios, pools, or gardens
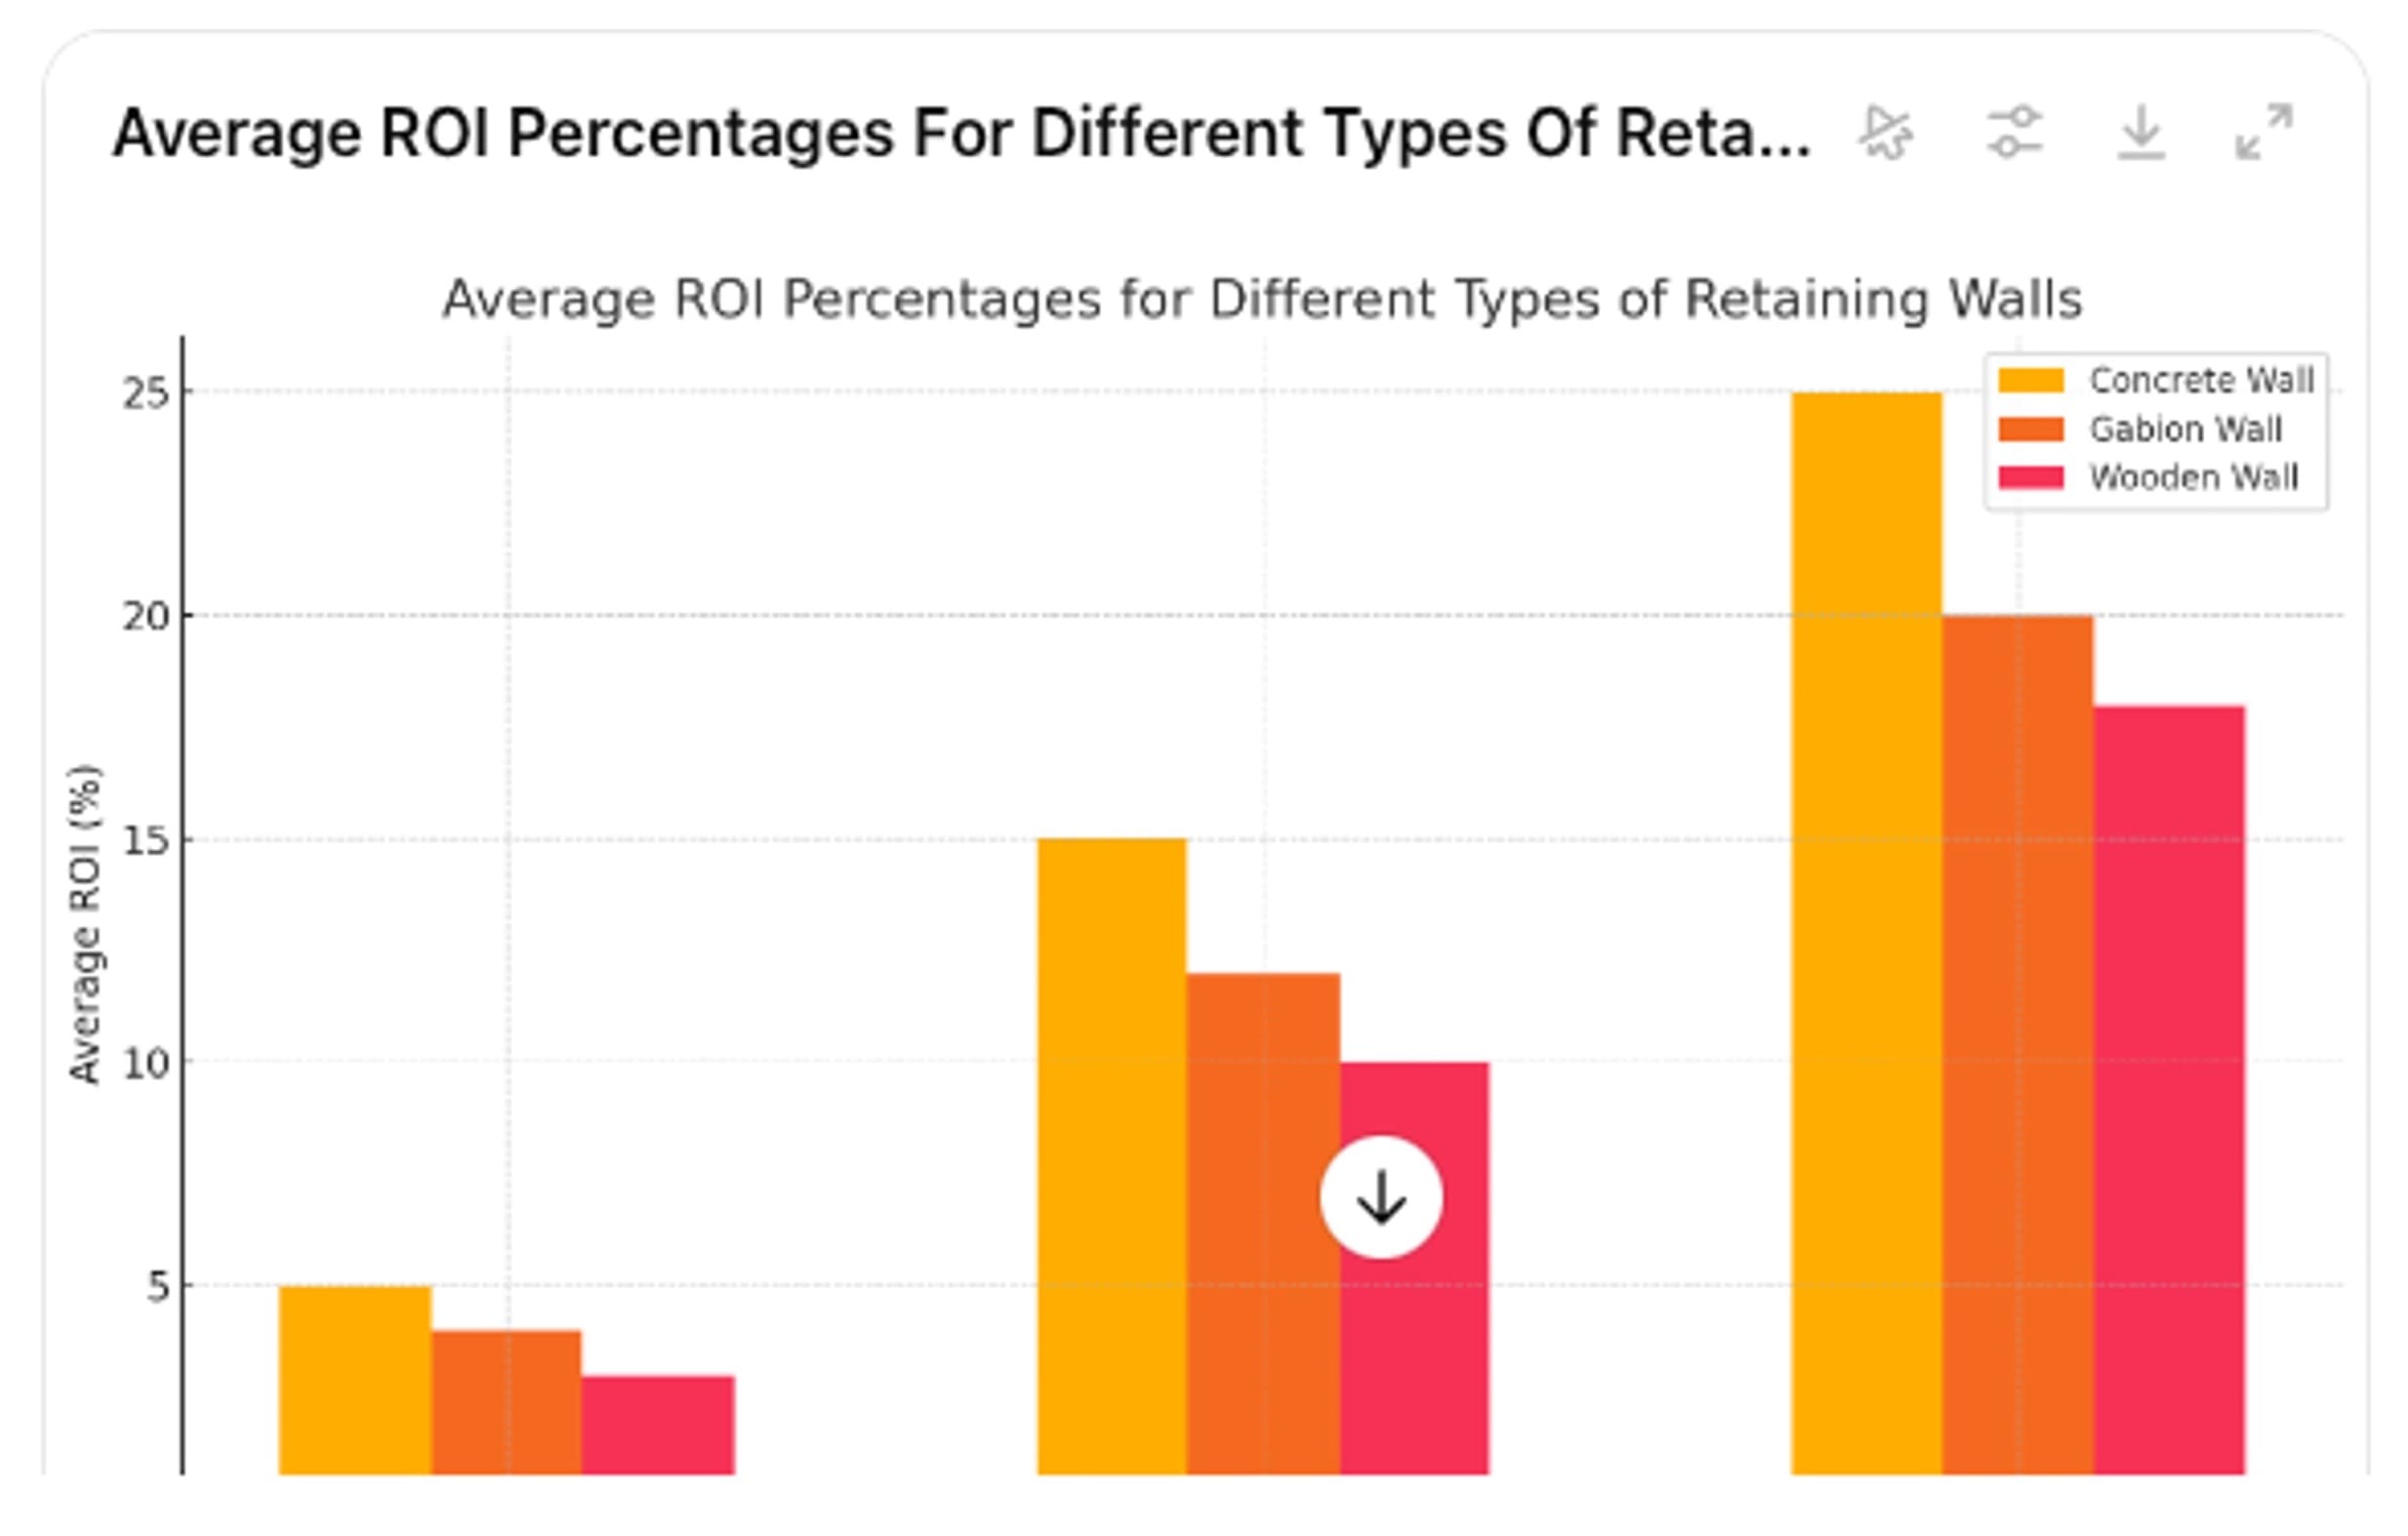
Real Estate Pro Tip: While a well-designed retaining wall can certainly add value, it’s rarely a dollar-for-dollar return. Expect to recoup about 50-80% of your investment, depending on your local market and the wall’s functionality.
Maintenance Costs and Longevity
A retaining wall is a long-term investment, and like any investment, it requires some upkeep to maintain its value.
A. Annual Maintenance Tasks and Costs
- Inspection: $100-$300 annually
- Cleaning: $100-$400 annually
- Sealing (for certain materials): $200-$800 every 3-5 years
- Plant control: $50-$200 annually
B. Lifespan Expectations by Material
- Concrete: 50-100+ years
- Stone: 100+ years
- Brick: 50-100 years
- Wood: 10-30 years
- Metal: 50+ years
C. Signs of Needed Repairs
- Bulging or bowing in the wall
- Cracks, especially horizontal ones
- Leaning
- Separation from adjoining walls
- Water seepage or inadequate drainage
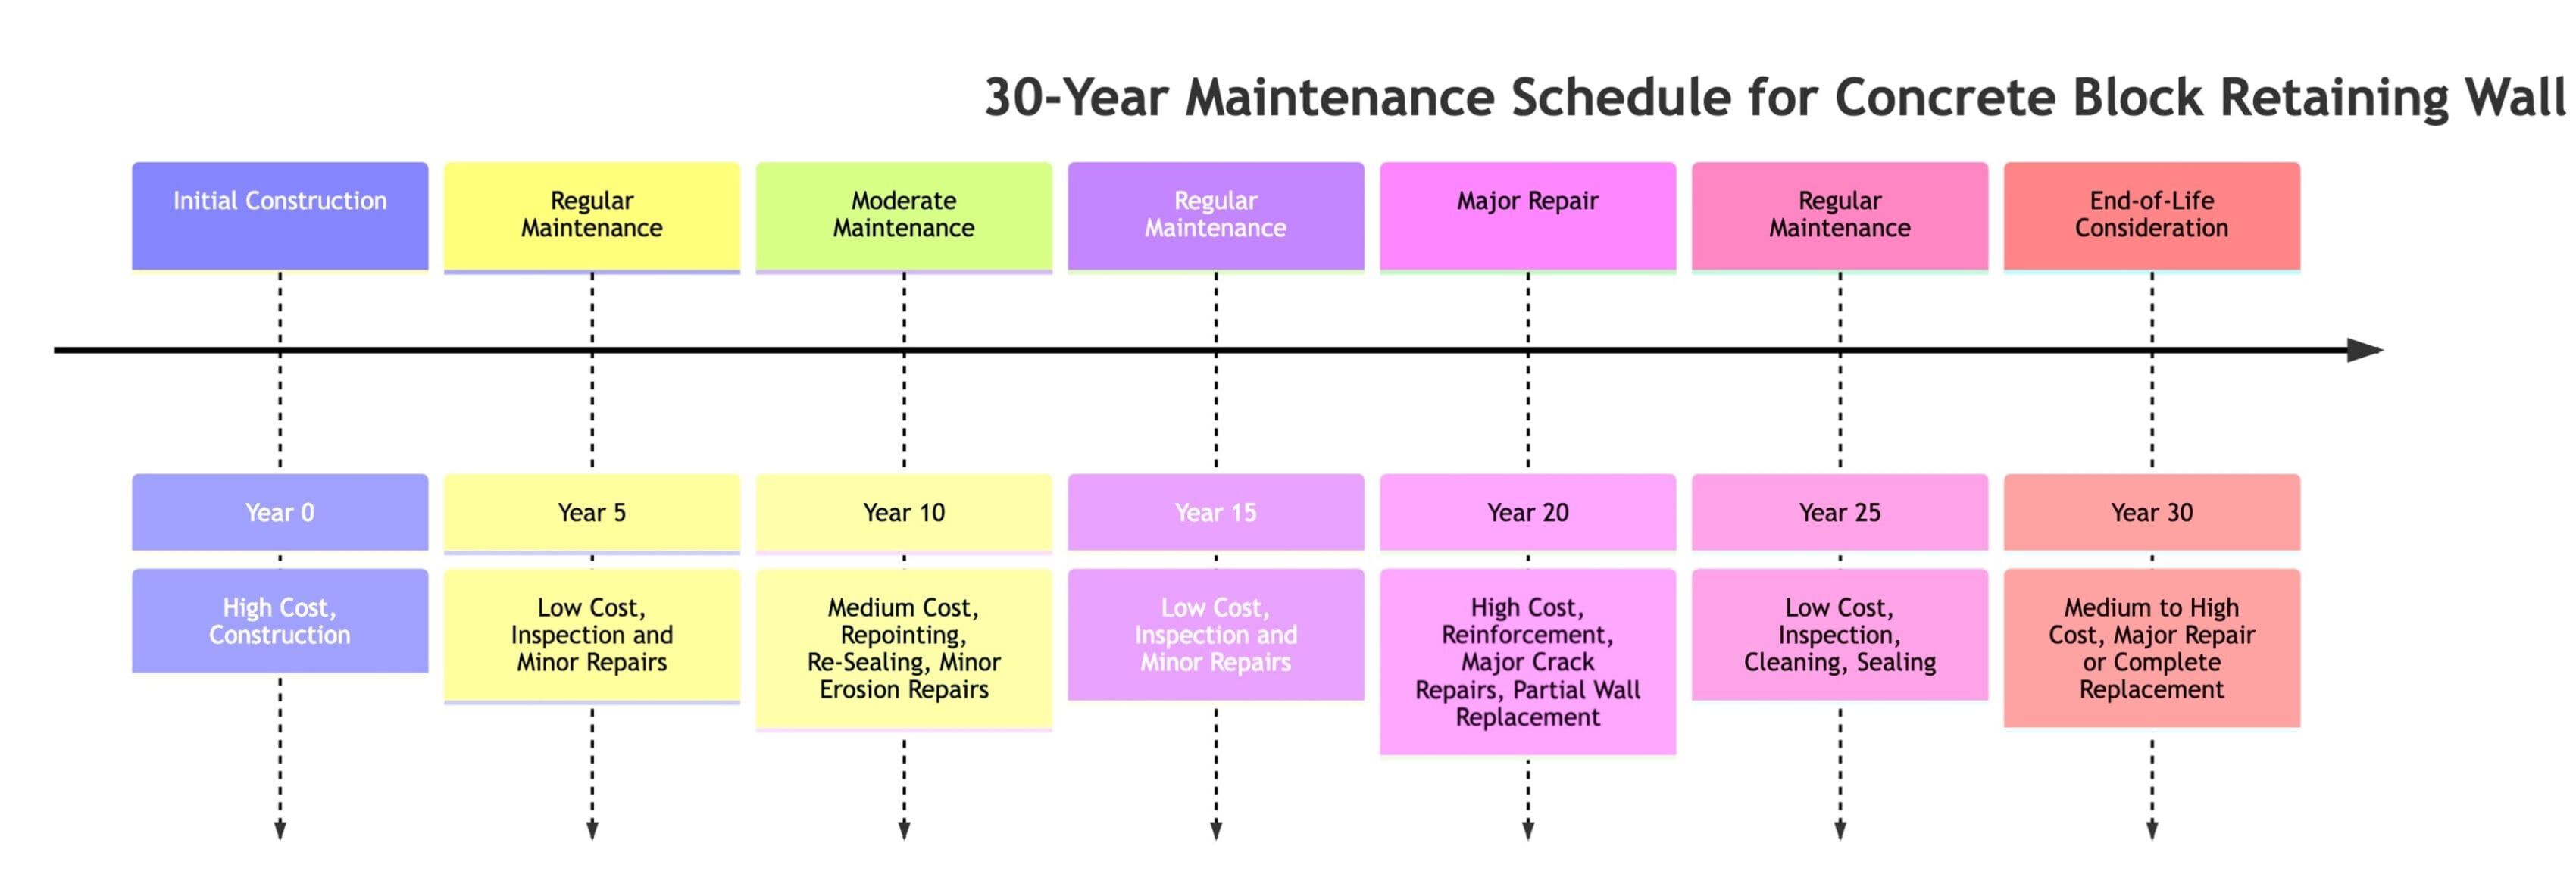
Maintenance Mantra: “An ounce of prevention is worth a pound of cure.” Regular inspections and minor repairs can prevent major, costly failures down the line.
Environmental Considerations and Sustainable Options
In today’s eco-conscious world, the environmental impact of your retaining wall is an important consideration.
A. Eco-friendly Materials
- Recycled plastic lumber: Durable and resistant to rot
- Reclaimed wood: Charming rustic look with a lower environmental impact
- Locally-sourced stone: Reduces transportation emissions
B. Drainage and Erosion Control
- Permeable materials allow for better water absorption
- Proper drainage systems prevent soil erosion and water pollution
C. Native Plant Integration
- Use native plants on and around your wall to support local ecosystems
- Plants can enhance wall stability and reduce runoff
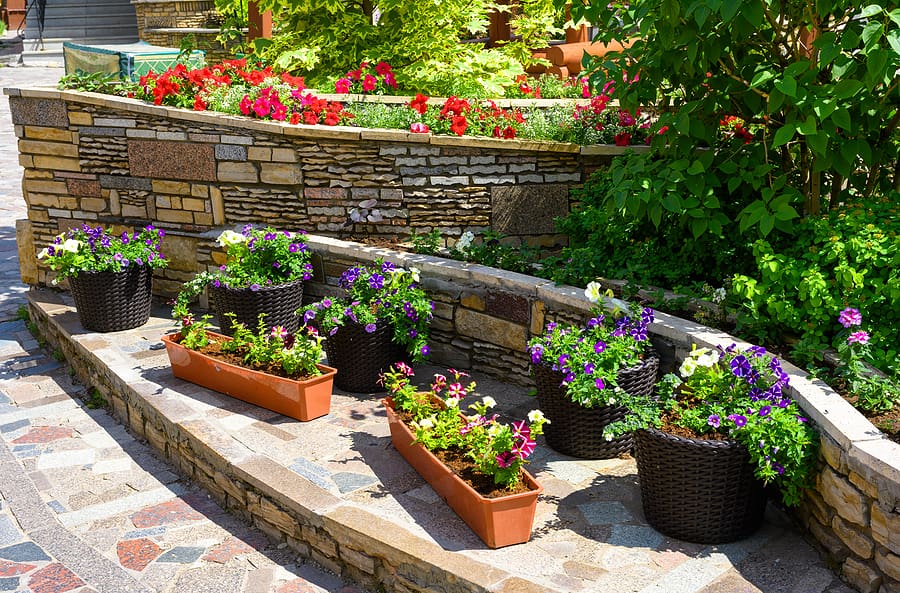
Green Building Tip: Consider a “living wall” system that incorporates plants directly into the retaining wall structure. These can provide excellent erosion control while creating a stunning visual feature.
Regional Cost Variations
Retaining wall costs can vary significantly depending on where you live. Let’s break down these regional differences.

A. Factors Influencing Regional Prices
- Local material availability
- Labor costs
- Climate and soil conditions
- Local building codes and permit requirements
B. High-Cost vs. Low-Cost Areas
High-Cost Areas:
- Northeast (e.g., New York, Massachusetts)
- West Coast (e.g., California, Washington)
- Why: Higher labor costs, stricter building codes
Low-Cost Areas:
- Midwest (e.g., Indiana, Ohio)
- South (e.g., Alabama, Arkansas)
- Why: Lower labor costs, more readily available materials
Location-Specific Insight: In coastal areas, you might pay a premium for corrosion-resistant materials and specialized engineering to withstand potential flooding or storm surges.
Frequently Asked Questions
For a typical 30-50 foot wall, expect 3-5 days for professional installation. DIY projects could take 1-3 weeks, depending on your experience and available time.
Generally, walls under 4 feet don’t require a permit, but always check local regulations. Walls over 4 feet typically need a permit and often require an engineer’s approval.
Yes, but it requires careful planning and possibly terracing. For slopes greater than 3:1 (horizontal:vertical), consult a professional.
Look for signs like bulging, cracking, leaning, or water seepage. If you notice any of these, consult a professional promptly.
Interlocking concrete blocks are often best for DIY projects. They’re relatively easy to work with and don’t require mortar.
Generally, the base should be buried at least 1 inch for every 8 inches of wall height. For example, a 4-foot wall would need a base buried at least 6 inches deep.
For walls under 3 feet, DIY can save money if you have the skills and time. For taller or more complex walls, professional installation is often safer and more cost-effective in the long run.
Regular maintenance includes annual inspections, cleaning, controlling plant growth, and ensuring proper drainage. Seal concrete or wood walls every few years.
Conclusion
Retaining walls are more than just functional structures; they're investments in your property's value, safety, and aesthetic appeal. Whether you're looking to maximize usable space, solve drainage issues, or simply enhance your landscaping, a well-planned and properly executed retaining wall project can transform your property.
Key Takeaways:
- Costs typically range from $25 to $50 per square foot, with numerous factors influencing the final price.
- Material choice significantly impacts both cost and longevity – choose based on your budget, aesthetic preferences, and long-term goals.
- For walls over 4 feet tall, professional installation is usually the safest and most cost-effective option.
- Regular maintenance is crucial for maximizing your wall's lifespan and protecting your investment.
- Consider environmental factors and sustainable options to minimize your project's ecological impact.
Remember, every property is unique, and what works for one might not be ideal for another. Take the time to thoroughly assess your needs, consult with professionals, and plan carefully. A well-executed retaining wall project can not only solve practical issues but also add significant value and beauty to your property for years to come.
Final Pro Tip: Don't rush your decision. Take the time to research, plan, and budget properly. A well-thought-out retaining wall project will pay dividends in functionality, aesthetics, and property value for decades to come.
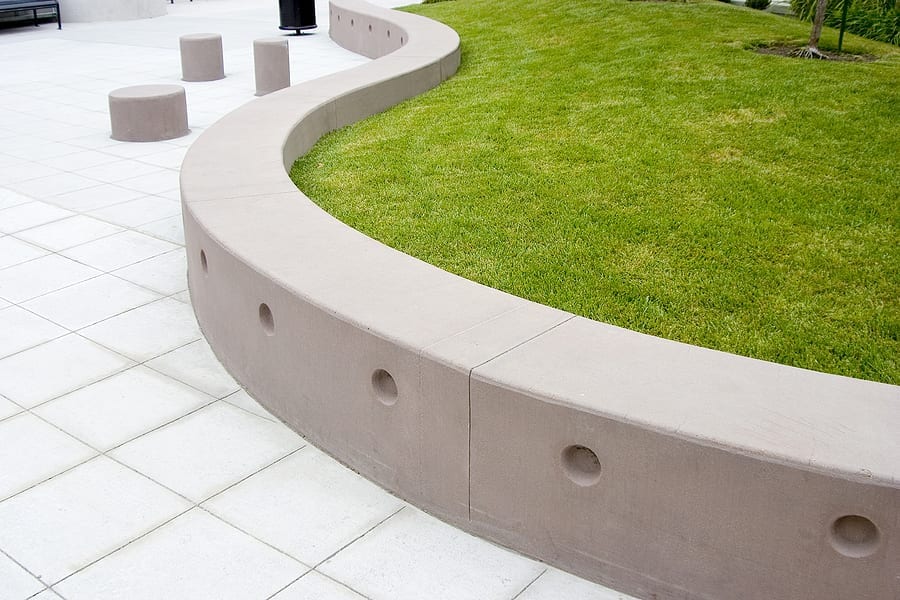


$65 a ft in Tennessee for reinforced concrete walls
These prices on reinforced concrete walls in Tennessee we get $65 a ft if anybody gets a job here .Great stuff tho!!!
Dang, you provided some amazing examples and really covered the basis on almost every material. Thanks for the quality insights and for taking your time to write such detailed content. Rock on!
I was really interested when you stated that retaining walls are a great way to control rain erosion. Our lawn has had some trouble in the past whenever storms come and bombard the place with rain, so I could really use something like this to make sure we don’t have to do a lot of land work every now and then. I’ll look out for any retaining wall experts that can help me build some before the rainy seasons kick in again.
I have some hilly areas on my property, and it makes it hard to use the space. It makes sense that using a retaining wall would be beneficial! That seems like a good way to have some extra flat space to use for landscaping.